Adjustable
SBLM-A™
This adjustable mechanism has a patented technical engineering advantage over any other Wallbed mechanism now in use. The power of the SBLM-A mechanism is held in reserve until the Panel Bed Face is in position – then the SBLM-A Power Pack is adjusted to bring the bed into perfect balance.
This new lift mechanism is not intended to reduce the number of springs or the amount of power required to lift and balance the panel bed. Its unique design and ease of adjustment make the installation safer and simpler.
TECHNICALLY ADVANCED MECHANISM:
- Better balance can be achieved by adjustment.
- Easier to add or reduce the number of springs.
- The user/installer is NOT required to manually arm the mechanism – it is all done by screw adjustment.
- Safer.
SBLM-A™ Power Pack is adaptable to fit the Alpha Bed™ steel bed frame (SBF) or Beta
THE MECHANISM
SPACE AGE HEAVY-DUTY MECHANISM:
Designed for everyday use in a residential or commercial installation. Balances with fingertip control for ease of operation. Mounts to vertical sidewalls of the cabinet.
ADJUSTABLE TENSION TO BALANCE:
Apply varying spring combinations to balance all bed sizes, single through king, vertical or horizontal mount orientations.
DURABILITY:
Tested to perform thousands of cycles without failure.
COMPACT:
Needs only 1” of cabinet width on each side.
STRENTH AND LOAD:
Will handle all bed and mattresses sizes to accommodate all preferences.
LIFETIME WARRANTY:
Limited lifetime warranty on manufacturer’s defects. Misuse, abuse, or damage by misapplication are not covered.
What we offer EXTRA in this product that others at comparable prices do not:
- Heavy-duty mechanism with a Lifetime Guarantee
- Safety Steel Mechanism Covers
- Complete Cabinet Assembly Hardware
- Complete Leg Assembly with patent-pending Leg Connector Rod
- The best and most complete instruction manual
* reference the cordinating diagrams above *
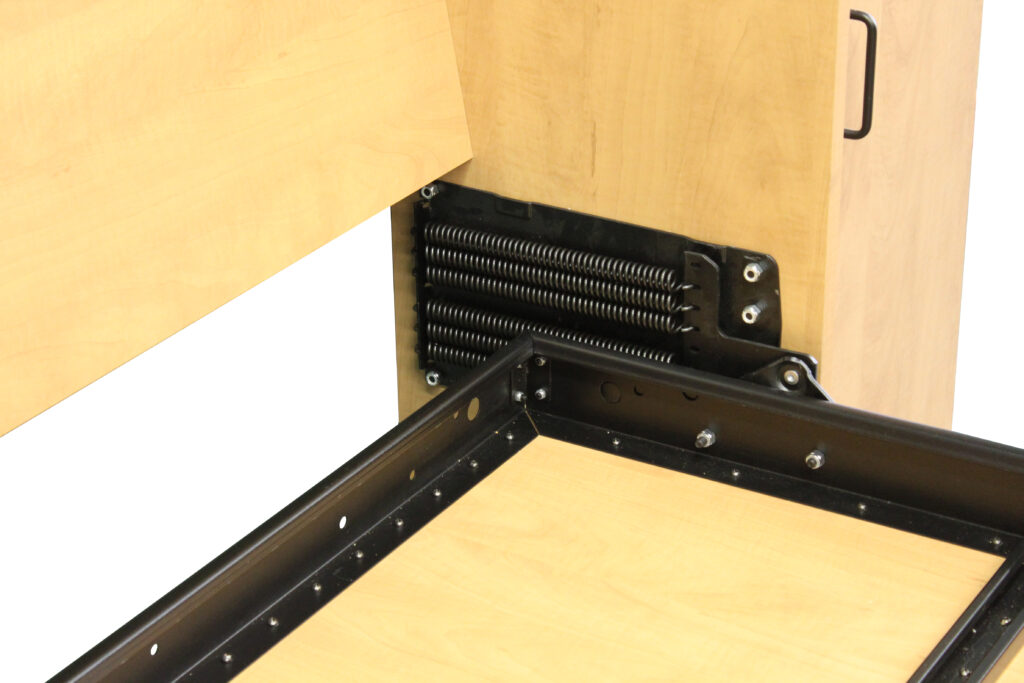
THE MECHANISM
Installs directly onto the cabinet Side Panels and bolts secure in 5 places. Bolt hole template is included with the instructions.
FRAME SETUP
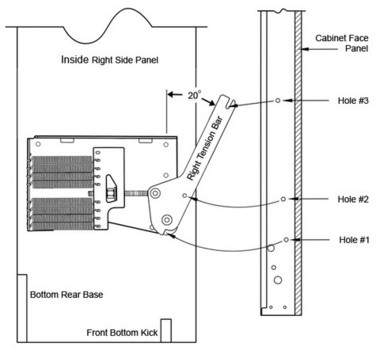
You should have an equal number of springs on each side of the
adjustment screw. Use the same number of springs and the same layout on both left and right mechanisms. Loosen the adjustment nut so the Tension Bars are angled approximately 20 degrees for access to the bolt heads.
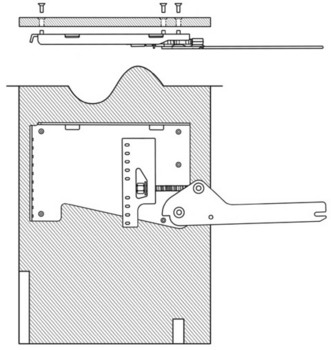
1. Insert the two Allen Head Bolts from the outside of the frame through the #1 Holes and secure tightly using 5/16” Nylock Nuts.
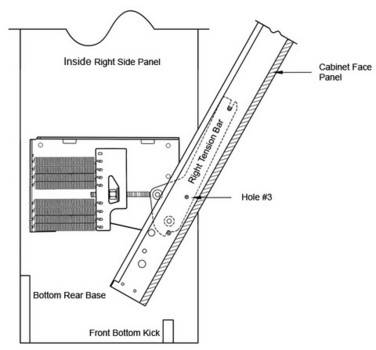
2. Insert two 5/16” Hex Head bolts from the outside of the frame through the #3 Holes. Affix 5/16” Nylock Nuts until flush with the bolt ends.
3. Stand the bed face panel in VERTICAL position between the tension arms, lift evenly until the Hex Head Bolts in the #3 Holes drop into the notch end of each Tension Bar.
4. Gently tilt the bed face toward you until the Allen Bolts in the #1 Holes are completely seated in the bottom notches of the Tension Bars. Insert the remaining 5/16” x 3/4” Hex Head Bolts in the #2 Holes from the outside in, and tighten the bolts in Holes number 2 and 3 securely.
The frame is now secured to the mechanism.
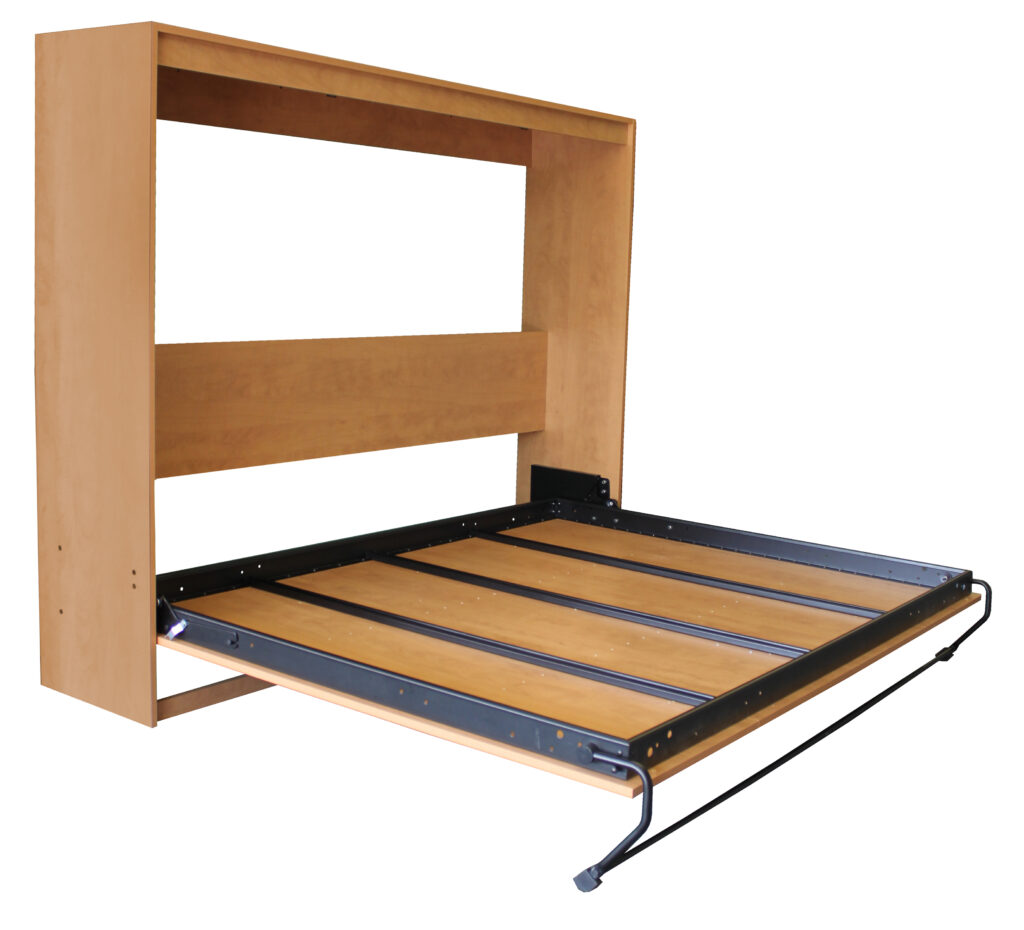
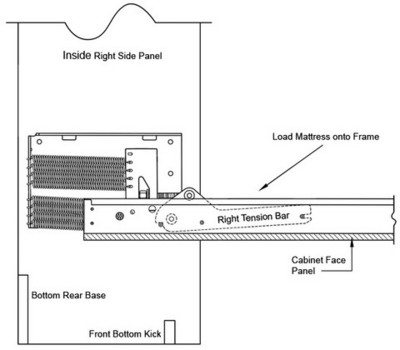
LOADING THE MATTRESS
Pull the frame down into its horizontal position. You will need one person to hold the frame down while the other person loads the mattress onto the bed frame/face panel. Secure it down with the Velcro straps that are provided.
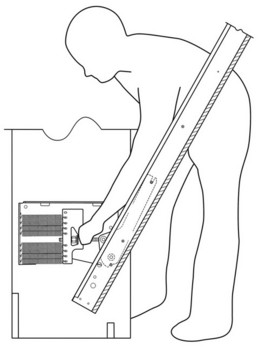
Caution: If possible, have a helper assist in the setting of the frame onto the mechanism and the loading of the mattress onto the mattress frame because it will be under tension by the springs.
LEVELING
Leveling the bed is essential. Using the same 3/4” open end wrench as before, tighten the adjuster nut on the right and left sides evenly. Check to make sure the frame (with mattress) is leveled both side to side and front to back. Proper leveling will facilitate proper closure annd exact sight lines of the fit of the face panel to the cabinet. The installer will need the bed face open enought to adjust the mechanism.